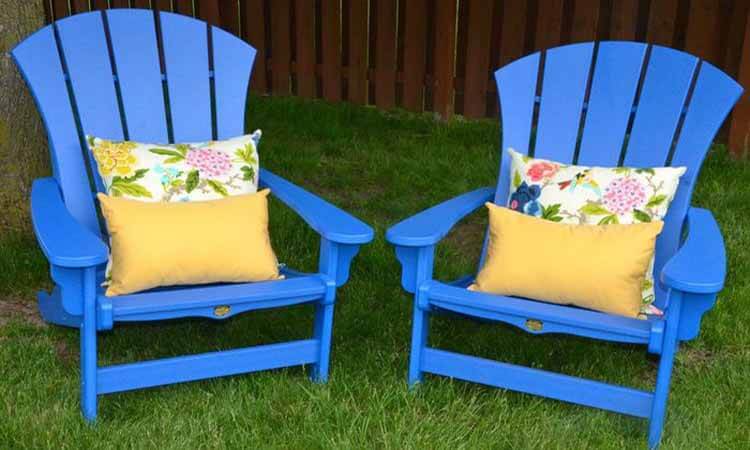
Adirondack chairs are a lounging favorite for many. Their unique design makes them a joy for dozing off on a summer afternoon. They are a great addition to your outdoor furniture collection that is stylish and have great utility.
To make any lounging furniture more comfortable, you will need cushions. However, cushions for these chairs can cost you a pretty penny. Knowing how to make cushions for Adirondack chairs can save you a lot of money.

With this guide, let’s find out how you can make your own cushions with a few sewing skills.
Things Required for Making Adirondack Chair Cushions
For making your own cushions for your Adirondack chairs, you will need a few tools and materials. Here is a list of them –
Tools
- Long bladed utility knife
- Sewing machine
- Tape Measure
- Yardstick
- Scissors
- Pencil for marking
Materials
- 2 inches’ thick foam sheets
- Standard weight thread
- Sewing needle
- Fabric for a cushion cover
- Fabric pins
- Straps around 24” long
Step-by-Step Process for Making Cushions
Now we will describe the easiest process you can follow to make fashionable and comfy cushions for your Adirondack chairs:
Step 1: Take the Measurements of Your Chair
For getting started with your DYI cushions, first, you need to measure the different dimensions of your chair as required. Remember to note down the measurements as you take them.
- Measure the longest part of the seat, generally from the front edge at the center of the seat to the backrest
- Measure the width of the front edge of your chair – from inside of one arm to the other
- For the backrest, measure the length at the center
- Measure the width of the backrest at the shoulders or from the point where there is arcing
- Finally, draw a simple image of the chair from a frontal view and jot down the measurements for a reference frame
Step 2: Cutting the Foam into Shape
- Using the measurements, mark out two pieces of rectangular foam – one for the seat and one for the backrest
- Cut the foam as carefully as possible using your long-bladed knife or scissors
- Try to sit the foams on the chair to get a sense of the fit
- Sit the backrest foam on top of the seat foam
- Using your chair as a guideline, mark out the shape on your foams where they are sticking out of the chair
- Trim off the excess bits from the foam pieces as neatly as you can
Step 3: Marking the Measurements for the Covers
Whichever type of fabric you may have chosen, you’ll now need to mark the fabric according to the shapes of the foam to make a cover. Your fabric should be at least 46-48 inches wide and 6-8 inches longer than the added length of the two pieces of foam.
- Take two pieces of sufficiently long and wide fabric and lay them on top of each other
- If they have a pattern or stripe, lay them in a way that matches the patterns
- Pin the fabrics at the corners, so they don’t move
- Mark the horizontal center of the fabric now on top and make a vertical line of separation
- Similarly, draw vertical lines on the foams down the middle
- Take the seat foam and align its centerline with the centerline of the fabric, 3 inches above the bottom of the fabric
- Mark out the rectangular shape on the fabric using the straight edge of the yardstick
- From the top edge of the seat rectangle, measure 2 inches above and draw a straight line across the fabric
- Draw another line 1 inch above the last line as room for a seam between the two foams
- Mark the points for the straps
- On both sides, along with the height of the backrest
- On the midpoints of the curved connecting lines
- On both sides, along with the height of the seat
- Take your straps and fold them in half lengthwise
- Stick the folded sides out from between the two pieces of fabric about 1 inchalong with the marked points
- Sew all sides shut ½ an inch from the edge, except one side for inserting the foams and 2 straps for that side
- Now turn the entire cover inside out through the open side to get the markings on the inner side
- From the top part of the cover, measure the length of the backrest foam +2 inches and make a mark
- From the bottom, measure the length of the seat foam +2 inches and make another mark
- If these marks are very close to each other or match exactly, then your fit will be perfect
- From those marks, take ½ inches on the top and bottom to make 2 lines across
- Sew on the lines to shut them and make a hinge at where the foams would meet
- Insert the foams inside and fill them out to the corners
- Insert the last 2 straps with the folded side going into the cover along with the marked points
- Now you can sew all the sides shut along with the straps
- Marvel at your own creation
Conclusion
Fit your cushion on your chairs and tie them on with the straps, and they won’t fall off or slip away. And now that you know how to make cushions for Adirondack chairs, you can make another if your current one gets damaged or you add a new chair.